ML-303 V5
How does it sound?
Yeah, I know. First things first.
Sound Example 1 - A short loop
Sound Example 2 - Distorted, with drums from MFB 502
Sound Example 3 - A short loop
Sound Example 4 - A short loop
Sound Example 5 - With external distortion
The DIY Project
In 2003 there was an announcement on the forum at acidcode.de that the fifth version of the ML-303 will be available as a DIY kit. I was lucky to get a seat on the list containing 50 people who could order a kit to build your own Roland TB-303 clone. The kit came about 70€ and contained
- Two empty PCBs. The analog PCB was a detailed recreation of the 303 analog PCB. The digital PCB contained a PIC microcontroller, keys and LEDs to create a user interface.
- The PIC microcontroller, pre-flashed with a bootloader
- A manual how to build the kit
- An order list for common parts like transistors, capacitors, resistors, potentiometers, MIDI- and Audio-Jacks, buttons etc.
- Some very rare Japan transistors
What you still needed was
- A case (a member of the acidcode.de-Forum designed one and offered it to buy)
- Some solder skills
- The common parts
- Additional Japan Parts
This was in 2003. If you wanted authentic TB-303 sound you had to buy one. The alternatives were the x0x-Box, the MAM MB-33, ReBirth and the Future Retro 777. I don't know exactly what ML stands for, but the name of the initiator was Mathias Märker, so I guess the M has to do with this.
The acidcode.de forum was for some reason then moved to the Lötstelle 303-Forum which is also not active any more and only accessible through the Wayback Machine.
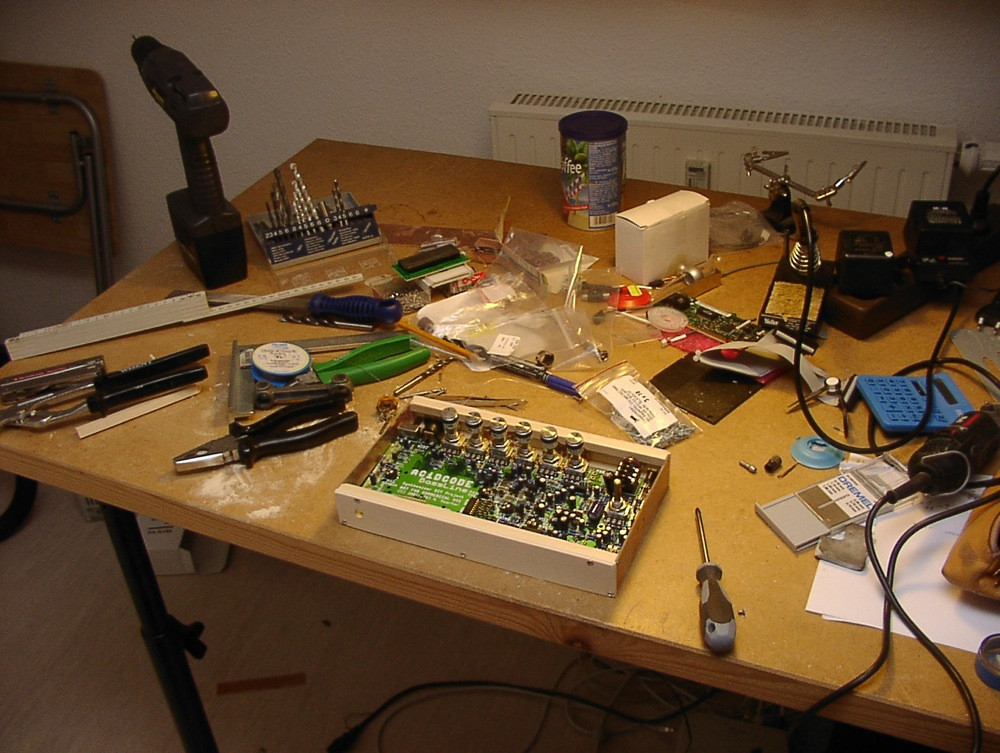
The first version (2003)
Soldering was easy and straightforward. The manual was very good and detailed. It took me approximately one week.
A bigger problem was the case. For some reason I did not opt in for the case from acidcode-member Wintermute but instead wanted to do my own case. This was harder than expected: The wood-case I was imagining was not possible with my crude tools. So I referred to the plan of a friend of mine, who used pre-etched PCBs for cases. The can be cut very exactly and to connect them you just solder them together.
Another issue was the front panel. Although Schäffer is a very good company for making custom front panels, I was lacking detailed positions of the cutouts for Potentiometers, Buttons and LEDs to create a front panel which fits. So after 4,5 months I had resolved the case-issue and could use my 303-clone without having to worry about short-circuits any more.


The second version (2018)
With the advent of very good 303-clones like the Bassbot and the TD-3 I felt a bit jealous of these devices. They didn't have the shortcomings of my ML-303, which were
- The buttons became bad. They bounced, they missed presses
- The ML-303 had no Korg-compatible Sync IN. Only MIDI.
- The 24V Wall-Wart was huge
- Somewhere was a loose contact. When moving the 303 it often rebooted itself.
- The red LED was ... awful
So I gave the Nice-Case-Approach another try. While the 303 was open I researched the loose contact, which was the power connection between the two PCBs. I fixed this with hot glue and re-soldering.
The huge wall-wart was replaced by a smaller one, which had a cord from the socket to the power supply and then another cord from the power supply to the 303.
I could not change the Sync-Issue. I also could not change the button-issue: Buttons with these footprints were only available at the german distributor Conrad at the time the 303 was built. They were discontinued and there is no alternative. What I could have done was to re-layout the PCB with better buttons. This would be ok, but I also would have to rescue the pre-flashed PIC processor for re-use. I didn't dare to remove this through-hole monster. So I just kept the buttons.
The display-change was no problem.
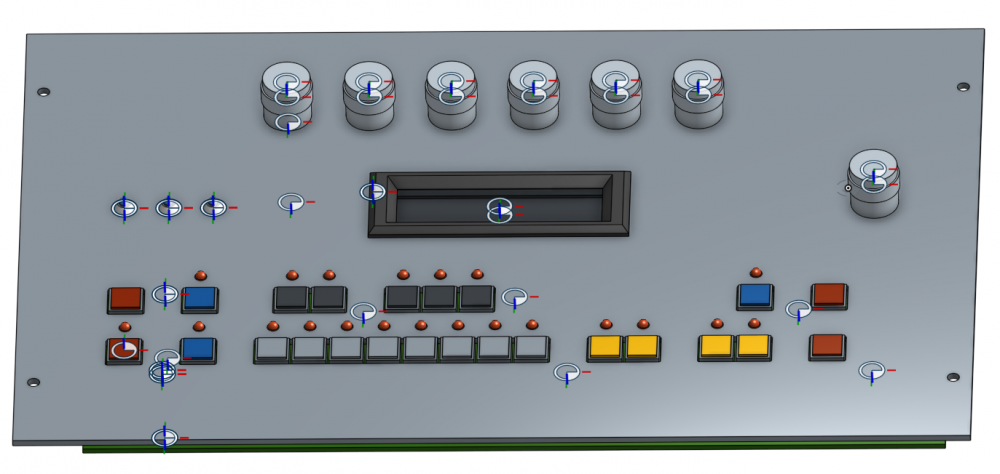
The Case
I took the chance to teach myself parametric 3D modeling using OnShape. I modeled both PCBs, their relative positions and the position in the case to create cutouts for another try of the front panel. Here is a link to the OnShape-Model. After a lot of measuring I have chosen the case 1444-1172 from Hammond Manufacturing. The case was powder coated in RAL7043 (Verkehrsgrau B) by Franz Frenzel in Düsseldorf.
Then I teached myself vector graphics in InkScape to create the print for the front panel.


| Description | File Size | ||||
|---|---|---|---|---|---|

|
Frontpanel for the ML-303 V5, 2nd Iteration | 23 Jun 2021 | 109 kB | 2511 | |
This ZIP-File contains the Front Panel for my second Iteration as SVG-File, PDF-File and FPD-File (Schäffer Front Panel Designer). |
|||||
|
|
Building instructions for the ML-303 V6 | 23 Jun 2021 | 3 MB | 2689 | |
The V6 is the successor to the V5. I don't own one but I downloaded the files. These are the instructions to build the V6. |
|||||
|
|
Building instructions for the ML-303 V5 | 23 Jun 2021 | 5 MB | 2758 | |
These are the instructions to build the V5. |
|||||
|
|
Firmware-Archive for the ML-303 V5 | 23 Jun 2021 | 1 MB | 2453 | |
In the Matze-Directory you can find the original firmware from the creator, Mathias Märker. These are the versions 5.01 and 5.1 Later Transistor took over and upgraded the firmware to V7beta.hex. At least I think this is the last one, my own 303 shows 7.02 on boot. |
|||||

|
Fold-your-own-303 | 23 Jun 2021 | 560 kB | 2558 | |